Your browser doesn't support JavaScript mfc Archives - Windows Programming

Mapping Modes

The mapping mode governs how Windows translates logical coordinates into device coordinates within the current device context. Logical coordinates represent the graphics and text application values and the device coordinates are the resulting pixel positions within a window. The mapping mode also determines the orientation of the X-axis and the Y-axis and whether the values of X and Y increase or decrease with respect to the origin. The default device context sets logical units the same as pixels with the X axis being right positive, the Y axis being positive down, and sets the coordinate origin to the upper left corner of the window. Windows defines eight mapping modes. These are listed below

Mapping Mode Logical Unit x-axis and y-axis
MM_TEXT Pixel Positive x is to the right; positive y is down
MM_LOMETRIC 0.1 mm Positive x is to the right; positive y is up.
MM_HIMETRIC 0.01 mm Positive x is to the right; positive y is up.
MM_LOENGLISH 0.01 in Positive x is to the right; positive y is up.
MM_HIENGLISH 0.001 in Positive x is to the right; positive y is up.
MM_TWIPS 1/1440 in Positive x is to the right; positive y is up.
MM_ISOTROPIC user-specified user-specified
MM_ANISOTROPIC user-specified user-specified

To select a different mapping mode, use the CDC member function SetMapMode()

virtual int SetMapMode( int nMapMode );

where
nMapMode specifies the new mapping mode. The Return Value is the previous mapping mode.

Programmable Mapping Modes

The MM_ISOTROPIC and MM_ANISOTROPIC mapping modes differ from the other mapping modes in that the unit of measurement used to transform logical coordinates to device coordinates is user-defined. The MM_ISOTROPIC and MM_ANISOTROPIC mapping modes differ from each other in that with the former, the range of the x-axis and y-axis must be the same, and with the latter, the range of the x-axis and y-axis can be different. Selecting either of these modes means the developer will need to set the Window dimensions.

To set the logical extents of the window associated with the device context using the SetWindowExt() member function. To map the corresponding device size, known as the viewpoint onto these logical coordinates use the SetViewportExt() member function.

SetWindowExt

Sets the x- and y-extents of the window associated with the device context.

virtual CSize SetWindowExt( int cx, int cy ); virtual CSize SetWindowExt( SIZE size );

Parameters
cx – Specifies the Window x-extent (in logical units).
cy – Specifies the Window y-extent (in logical units).
size – Specifies the Windows x- and y-extents (in logical units).

Returns the previous extents of the window as a CSize object. If an error occurs, the x- and y-coordinates of the returned CSize object are set to 0.

SetViewportExt

Sets the x- and y-extents of the viewport of the device context.

virtual CSize SetViewportExt( int cx, int cy ); virtual CSize SetViewportExt( SIZE size );

Parameters
cx – Specifies the x-extent of the viewport (in device units).
cy – Specifies the y-extent of the viewport (in device units).
size – Specifies the x- and y-extents of the viewport (in device units).

Returns the previous extent of the viewport as a CSize object. When an error occurs, the x- and y-coordinates of the returned CSize object are set to 0.

For example, if SetViewportExt is called with parameters 100,50 and SetWindowExt is called with parameters 100,100 this will mean that each logical unit in the X direction will equate to 1 device unit and each logical unit in the y direction will equate to 1/2 a unit in the device coordinate.

Moving the Origin

By default, a device context’s origin, regardless of the mapping mode is in the upper left corner of the display. The device context origin can be changed by the CDC member functions SetWindowOrg() and SetViewportOrg(). The former moves the windows origin, and the latter, the viewport origin. The prototype for these functions are

CPoint SetWindowOrg( int x, int y ); CPoint SetWindowOrg( POINT point );

And

virtual CPoint SetViewportOrg( int x, int y ); virtual CPoint SetViewportOrg( POINT point );

where
cx – Specifies the x-extent (in logical units) of the window.
cy – Specifies the y-extent (in logical units) of the window.
size – Specifies the x- and y-extents (in logical units) of the window.

Returns the previous origin or viewport of the window as a CPoint object

Example

The following short program draws 5 squares under different mapping to illustrate the different display characteristics of each

Download Code

MFC Data Handling

MFC Collections classes

The MFC library provides a rich series of collection classes providing an easy and safe way to manage dynamic data. The MFC library collection classes are divided into template-based and non-template classes.

The template classes

CArray – Supports arrays that can dynamically reduce and grow as necessary.
For further detailed reading – https://docs.microsoft.com/en-us/cpp/mfc/reference/carray-class?view=vs-2019

CList – supports ordered lists of nonunique objects accessible sequentially or by value.
https://docs.microsoft.com/en-us/cpp/mfc/reference/clist-class?view=vs-2019

CMap – is a dictionary collection class that maps unique keys to values
https://docs.microsoft.com/en-us/cpp/mfc/reference/cobject-class?view=vs-2019

CtypedPtrArray – Provides a type-safe “wrapper” for objects of class CPtrArray or CObArray.
https://docs.microsoft.com/en-us/cpp/mfc/reference/ctypedptrarray-class?view=vs-2019

CTypedPtrList – Provides a type-safe “wrapper” for objects of class CPtrList
https://docs.microsoft.com/en-us/cpp/mfc/reference/ctypedptrlist-class?view=vs-2019

CTypedPtrMap – Provides a type-safe “wrapper” for objects of the pointer-map classes CMapPtrToPtr, CMapPtrToWord, CMapWordToPtr, and CMapStringToPtr.
https://docs.microsoft.com/en-us/cpp/mfc/reference/ctypedptrmap-class?view=vs-2019

The non-template classes

CObArray – Supports arrays of CObject pointers.
https://docs.microsoft.com/en-us/cpp/mfc/reference/cobarray-class?view=vs-2019

CByteArray – Supports dynamic arrays of bytes.
https://docs.microsoft.com/en-us/cpp/mfc/reference/cbytearray-class?view=vs-2019

CDWordArray – Supports arrays of 32-bit doublewords.
https://docs.microsoft.com/en-us/cpp/mfc/reference/cdwordarray-class?view=vs-2019

CPtrArray – Supports arrays of void pointers.
https://docs.microsoft.com/en-us/cpp/mfc/reference/cptrarray-class?view=vs-2019

CStringArray – Supports arrays of CString objects.
https://docs.microsoft.com/en-us/cpp/mfc/reference/cstringarray-class?view=vs-2019

CWordArray – Supports arrays of 16-bit words
https://docs.microsoft.com/en-us/cpp/mfc/reference/cwordarray-class?view=vs-2019

CUIntArray – Supports arrays of unsigned integers.
https://docs.microsoft.com/en-us/cpp/mfc/reference/cuintarray-class?view=vs-2019

CObList – Supports ordered lists of nonunique CObject pointers accessible sequentially or by pointer value.
https://docs.microsoft.com/en-us/cpp/mfc/reference/coblist-class?view=vs-2019

CPtrList – Supports lists of void pointers.
https://docs.microsoft.com/en-us/cpp/mfc/reference/cptrlist-class?view=vs-2019

CStringList – Supports lists of CString objects.
https://docs.microsoft.com/en-us/cpp/mfc/reference/cstringlist-class?view=vs-2019

CmapPtrToWord – Supports maps of 16-bit words keyed by void pointers.
https://docs.microsoft.com/en-us/cpp/mfc/reference/cmapptrtoword-class?view=vs-2019

CMapPtrToPtr – Supports maps of void pointers keyed by void pointers.
https://docs.microsoft.com/en-us/cpp/mfc/reference/cmapptrtoptr-class?view=vs-2019

CMapStringToOb – A dictionary collection class that maps unique CString objects to CObject pointers.
https://docs.microsoft.com/en-us/cpp/mfc/reference/cmapstringtoob-class?view=vs-2019

CMapStringToPtr – Supports maps of void pointers keyed by CString objects.
https://docs.microsoft.com/en-us/cpp/mfc/reference/cmapstringtoptr-class?view=vs-2019

CMapStringToString – Supports maps of CString objects keyed by CString objects.
https://docs.microsoft.com/en-us/cpp/mfc/reference/cmapstringtostring-class?view=vs-2019

CMapWordToOb – Supports maps of CObject pointers keyed by 16-bit words
https://docs.microsoft.com/en-us/cpp/mfc/reference/cmapwordtoob-class?view=vs-2019

CMapWordToPtr – Supports maps of void pointers keyed by 16-bit words.
https://docs.microsoft.com/en-us/cpp/mfc/reference/cmapwordtoptr-class?view=vs-2019

Simple Data Type Classes

MFC supplies a number of classes to encapsulate various data types widely used as parameters to the member functions of Windows classes. These are

CStringT – Holds character strings.
CTime – Holds absolute time and date values.
COleDateTime – Wrapper for the OLE automation type DATE.
CTimeSpan – Holds relative time and date values.
COleDateTimeSpan – Holds relative COleDateTime values
CPoint – Holds coordinate (x, y) pairs.
CSize – Holds distance, relative positions, or paired values.
CRect – Holds coordinates of rectangular areas.
CImageList – Provides the functionality of the Windows image list.
COleVariant – Wrapper for the OLE automation type VARIANT
COleCurrency – Wrapper for the OLE automation type CURRENCY

For further detailed reading
https://docs.microsoft.com/en-us/cpp/mfc/simple-data-type-classes?view=vs-2019

File input and output

MFC encapsulates the Windows API file-handling functions in the CFile class. It includes member functions for opening and closing files, reading and writing data, deleting and renaming files, and retrieving file information. For a full description of the Cfile class and associated member function go to the following.

For further reading
https://docs.microsoft.com/en-us/cpp/mfc/reference/cfile-class?view=vs-2019

Timers

Timers are used to schedule a periodic event and execute some program code. The CWnd member function SetTimer() initiates a timer to fire at specified intervals and CWnd member function KillTimer() stops the timer. A timer notifies an application that a time interval has elapsed in one of two ways:

By sending a WM_TIMER message to a specified window
By calling an application-defined callback function

The prototype for the CWndSetTimer is

UINT SetTimer( UINT nIDEvent, UINT nElapse, lpfnTimer);

where
nIDEvent – Specifies a timer identifier. Must not be zero.
nNElapse – Specifies the time-out value, in milliseconds.
lpfnTimer – Specifies the address of the application-supplied TimerProc callback function that processes the WM_TIMER messages. If this parameter is NULL, the WM_TIMER messages are placed in the application’s message queue and handled by the CWnd object.

Returns the timer identifier if the function is successful.

As an example

SetTimer (1, 700, NULL);

Assigns a timer ID of 1, and sends WM_TIMER message to the window whose SetTimer function was called every 700 milliseconds. The final NULL parameter configures the timer to send WM_TIMER messages rather than call a callback function

Responding to WM_TIMER Messages

MFC’s ON_WM_TIMER message-map macro responds to WM_TIMER messages by a call to the member function OnTimer. OnTimer is prototyped as follows:

afx_msg void OnTimer (UINT nTimerID)

where nTimerID is the ID of the timer that generated the message.

Setting a Timer to respond to a callback function

To set a timer that uses a callback, the 3rd parameter of the SetTimer function must be set to the name of the callback function as follows

SetTimer (ID_TIMER, 500, TimerCallBackProc)

The callback procedure is prototyped as follows:

void CALLBACK TimerCallBackProc (HWND hWnd, UINT nMsg, UINT nTimerID, DWORD dwTime)

where
hWnd contains the window handle,
nMsg contains the message ID WM_TIMER,
nTimerID holds the timer ID,
dwTime specifies the number of milliseconds that have elapsed since Windows was started.

Stopping a Timer

To stop a timer call the CWnd member function KillTimer, which stops a timer and stops the WM_TIMER messages or timer callbacks. The following statement releases the timer with ID is 1:

KillTimer (1);

Example

The following program illustrates a simple timer app by flashing a “hello world” message in the top left-hand corner of the window

Download Code

Multi-Document Interface

Multiple-document interface applications enable the user to work with more than one document simultaneously. Each document is displayed within a separate child window within the client area. An MDI child window looks much like a typical frame window, except that the MDI child window appears inside an MDI frame window and does not have a dedicated menu bar, but instead shares the menu of the MDI frame window. The framework automatically changes the MDI frame menu to represent the active MDI child window.

In addition to the 3 classes found in an SDI application, an MDI application must derive a class from CMDIChildWnd which provides the functionality for the Windows multiple document interface (MDI) child window. To make a document different from its parent, the application will also require additional resources to those associated with the main window.

A Multiple Document Interface (MDI) application uses the CMultiDocTemplate class derived from CdocTemplate.

If the MDI application uses more than one type of document then a separate template must be supplied for each document. This will require a separate template for each type of document using a CDocMultiDocTemplate constructor for each.

Working with Multiple-Document Types

By default, an SDI or an MDI application, created with the AppWizard will be configured with only a single document class. Additional document class types can however be added by making a second call to AddDocTemplate() in the application class InitInstance() member function as outlined below –

CMultiDocTemplate* pDocTemplate; PDocTemplate = new CMultiDocTemplate(IDR_SAMPLE1, RUNTIME_CLASS(CSample1Doc), RUNTIME_CLASS(CMDIChildWnd), RUNTIME_CLASS(CSample1View)); AddDocTemplate(pDocTemplate); pDocTemplate = new CMultiDocTemplate( IDR_SAMPL2, RUNTIME_CLASS(CSample2Doc), RUNTIME_CLASS(CMDIChildWnd), RUNTIME_CLASS(CSample2View)); AddDocTemplate(pDocTemplate);

The type of document to create can then be selected via the main menu.

Example

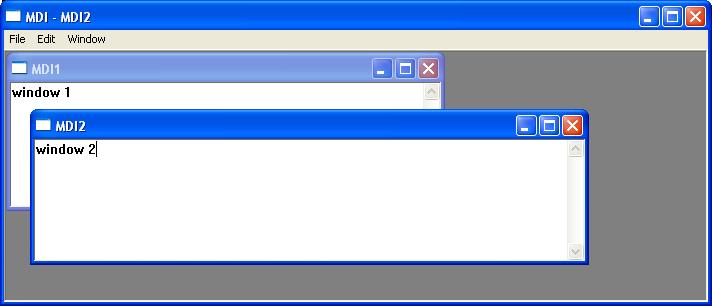
The application below allows the user to create a multi-document interface based on the CeditView view class

Download Code

Document View Architecture

The MFC Document View Architecture is a framework designed to separate the storage and maintenance of data from the display of data. This is achieved by encapsulating the data within a document class and the presentation specifics within a view class. The advantage of decoupling the view from the application data is of most use in larger applications when there are multiple views and multiple types of data objects to incorporate into an application.

MFC supports two types of document/view applications: single-document and multiple-document interface (SDI) applications.

Single Document interface

The expression Single Document Interface or SDI refers to a document that presents only one view to the user. This means the application is limited to displaying one document at a time. Notepad is an example of an SDI application. Notepad cannot open multiple text files without starting up another application instance. A simple single document/view application will contain four key class components-

The CDocumet class provides the basic functionality for an application’s document object. This functionality includes the ability to create load, save and update documents. This process of writing or reading data to a storage medium is known as serialization. The serialization objects supplied with MFC provide a standard and consistent interface, relieving the user from the need to perform file operations manually.

The CView Class encapsulates the document’s visual presentation rendering an image of the document on the screen or printer and handling user interaction through the view window. MFC provides several variations on the view class and the capabilities of a view class will depend on the MFC view class from which it derives. Further information about these view classes can be found at the following
https://docs.microsoft.com/en-us/cpp/mfc/derived-view-classes-available-in-mfc?view=vs-2019

The CMainFrame class encapsulates the frame window. MFC places the application view window into the client area of the frame window. In an SDI application, the view window is a child of the main frame window.

The CWinApp class is the base class from which every MFC programmer derives a Windows application object. This application object provides member functions for initialising and running the application.

Dynamic creation

In a document view application the view, frames and document objects are created dynamically using the following macros

DECLARE_DYNCREATE (class name) – found in the class declaration and allows dynamic creation of the class
IMPLEMENT_DYNCREATE(class-name, parent name) – found inside the class declaration. The class name is the name of the class being enabled and the parent class is the name of the MFC base class

Once the documents view and frame class have been created they can be used as parameters in a runtime class structure which is used as a parameter to create the document template using the class CsingleDocTemplate. The prototype of this class is –

CSingleDocTemplate( UINT nIDResource, CRuntimeClass* pDocClass, CRuntimeClass* pFrameClass, CRuntimeClass* pViewClass );

Where
nIDResource – Specifies the ID of the resources used with the document type.
pDocClass – Points to the CRuntimeClass object of the document class.
fFrameClass – Points to the CRuntimeClass object of the frame window class. This class can be a CFrameWnd-derived class, or the CFrameWnd itself.
pViewClass – Points to the CRuntimeClass object of the view class. This class is a CView-derived class you define to display your documents.

The newly created template can be added to the list of available document templates available to the application by calling the AddDocTemplate member function.

The CCommandLineInfo class encapsulates command line information when an application starts
And the ParseCommandLine parses the command line information.

Saving and loading documents

In a document view program the Serialize member function, defined in the CObject class, is responsible for loading or saving an object’s current state. The Serialize function contains a CArchive argument that is used to read and write the object data. The IsStoring or IsLoading member functions indicate whether Serialize is storing (writing data) or loading (reading data). An application either inserts or retrieves an application object’s data using the insertion operator (<<) or extracts data with the extraction operator (>>).

Example

In the following example, an SDI application is created which places a sequence of markers at the position of the mouse click. Selecting the relevant display option will change the display marker from x to asterisk and vice versa while the various file/save, file/load and /file/recent demonstrate how to save and load data using the serialize function

Download Code

Toolbars

MFC offers two classes to provide the functionality of the Windows toolbar: CToolbar and CtoolBarCtrl. The CToolBar encapsulates much of its functionality of the standard toolbar control whereas CToolBarCtrl offers a more substantive programming interface.

To create a toolbar the developer can either

1. Instantiate an object of the CToolbar class and then call the CreateEx() member function followed by the member function LoadToolBar() to load the toolbar resource.

2. Instantiate an object of the CtoolBarCtrl class and define a TBBUTTON structure to provide details about the individual buttons. The CtoolBarCtrl class also requires a bitmap resource containing images for the faces of the toolbar buttons.

Toolbar buttons are assigned command IDs and clicking a toolbar button sends a WM_COMMAND message to the parent windows where the button ID is linked to the relevant command handler.

In addition to buttons, Windows toolbars can contain combo boxes, checkboxes, and other non-push-button controls. MFC provides functions for hiding and displaying toolbars, saving and restoring toolbar states, and much more.

For a full description of the CToolBar Class and associated member functions
https://docs.microsoft.com/en-us/cpp/mfc/reference/ctoolbar-class?view=msvc-160#createex

For a full description of the CToolBarCtrl Class and associated member functions
https://docs.microsoft.com/en-us/cpp/mfc/reference/ctoolbarctrl-class?view=msvc-160

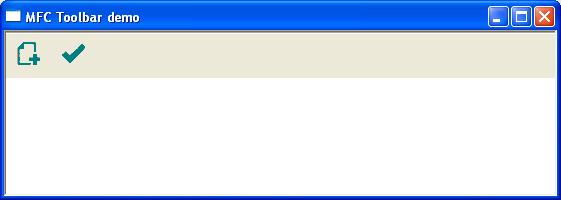
The following short program creates a simple program with two buttons. Clicking either button will produce a message box.

Example


Download Code

Common Dialog Box

Common dialogs are a set of predefined, standard dialogs that can be used in an application to carry out common tasks such as file selection, font selection, or colour selection. All the common dialog classes are derived from a common base class, CCommonDialog.

The behaviour and appearance of a common dialogue by set or altered by changing the parameters supplied to the dialog’s constructor or by setting various flags. All the common dialogs require the inclusion of the commdlg.h header file.

MFC CCommonDialog Classes are shown in the following table.

ClassPurpose
CColorDialogAllows the user to select or create a color
CFileDialogAllows the user to open or save a file
CFindReplaceDialogAllows the user to substitute one string for another
CFontDialogAllows the user to select a font from a list of available fonts
COleDialogUseful for inserting OLE objects
CPageSetupDialogAllows the user to set page measurement parameters
CPrintDialogAllows the user to set up the printer and print a document
CPrintDialogExPrinting and Print Preview for Windows 2000

For further detailed reading
https://docs.microsoft.com/en-us/cpp/mfc/reference/ccommondialog-class?view=vs-2019

Example

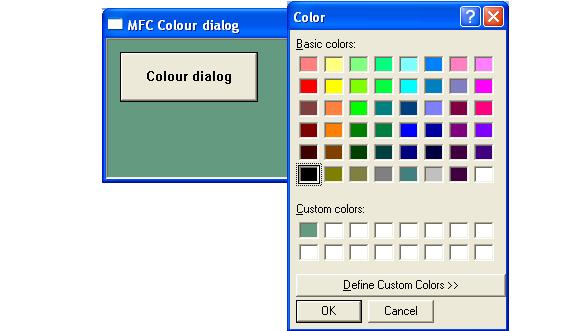
The following short program illustrates the use of the CColourDialog by changing the background colour of the windows to match that selected from the colour dialog box

Download Code

Dialog Windows

A dialog box is a temporary popup window an application uses to prompt the user for additional information input. A dialog box will usually contain one or more controls (child windows) with which the user can enter text, choose options, or control the direction of the application.

MFC encapsulates dialog box menus and all associated actions in the CDialog class. Dialogs are classified into modal and modeless depending on their behaviour. Modal dialog boxes prevent the user from accessing any other part of an application window until the dialog box is closed. In contrast, Modeless dialog boxes allow the user to access the application window without closing the dialog.

For simple dialogs, the CDialog class can be instantiated directly however to implement the full functionality of a dialog box it is necessary to derive a user-defined class from CDialog. This user-defined dialog class will need to have its own message map and handlers to respond to events within the dialog box since dialog box messages are not sent to the main window. A dialog box will usually be defined in a program resource file and incorporated into the application program.

A dialog box is closed when it receives an ID_CANCEL or an IDOK message. These messages are handled by the CDialog member functions OnCancel and OnOK. It is possible to override both handlers and write custom termination procedures.

Creating a Modal dialog box

To create a modal dialog box, the CDialog class constructor is initialised with details of the dialog resource identifier and the parent window. The prototype for the constructor function is

BOOL Cdialog objectname( LPCTSTR lpszTemplateName, CWnd* pParentWnd = NULL ); BOOL Cdialog objectname( UINT nIDTemplate, CWnd* pParentWnd = NULL );

where
lpszTemplateName – Contains a null-terminated string that is the name of a dialog-box template resource.
pParentWnd – Points to the parent window object (of type CWnd) to which the dialog object belongs. If NULL, the dialog object’s parent window is set to the main application window.
nIDTemplate – Contains the ID number of a dialog-box template resource.

returns nonzero if dialog-box creation and initialisation were successful and 0 if it fails.

Creating a modeless dialogue box

To create a modeless dialog box instantiate a CDialog class object using the default constructor without any parameters. The dialog box is then activated by a call to the CDilog member function create(). Modal dialog classes are usually instantiated on the stack so the dialog object won’t be destroyed prematurely when the calling procedure goes out of scope.


The code section below demonstrates a modeless and modal dialog box.

Download Code

Dialog-Based Applications

A dialog-based application is where the main window is a dialog box. This method simplifies the application build process by making controls easier to place onto the main window. An example of a dialogue-based application is the Windows calculator. Windows functionality will be defined in the Cdialog class in a dialog-based application. A class must therefore be derived from the Cdialog base class and instantiated. The object reference is then stored in the MFC member variable m_pMainWnd member and the window created by a call to the member function doModal.

Download Code

Child Windows – Adding Controls

A child window is a window that exists inside and is dependent on a parent window. The child window processes mouse and keyboard messages and notifies the parent window when the child window’s state has changed. A standard control is created by instantiating one of the MFC control classes and calling the associated object’s create member function.

Windows makes the classic controls available to the application programs it hosts by registering six predefined WNDCLASS’s. The control types, their WNDCLASS’s, and the corresponding MFC classes are shown in the following table.

Control TypeWNDCLASSMFC Class
Buttons“BUTTON”CButton
List boxes“LISTBOX”CListBox
Edit controls“EDIT”CEdit
Combo boxes“COMBOBOX”CComboBox
Scroll bars“SCROLLBAR”CScrollBar
Static controls“STATIC”Cstatic

Buttons

MFC’s CButton class encapsulates the Windows button controls. A Button is a simple control used to trigger an action. The appearance and behaviour of a button control are specified when it is created by including the appropriate style flag in the button’s window style. A button can have many different appearances such as a push-button, radio button, or checkbox.

Checkbox

A checkbox is a small square box with an associated descriptive label. Checkboxes function as a toggle switch switch between selected and de-selected. Clicking the box once causes a checkmark to appear; clicking again toggles the checkmark off. The CEdit member functions GetState() and GetState() can be used to check/set the state of a button and ON_BN_CLICKED macro maps the button click function to the button click event.

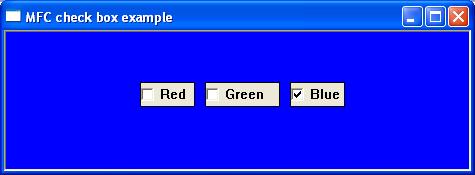
The following short program uses 3 checkboxes to change the window’s background colour. Selecting combinations of each produces a mixture of red green and blue. The initial default background colour is black while selecting all 3 buttons will produce white.


Download Code

RadioButton

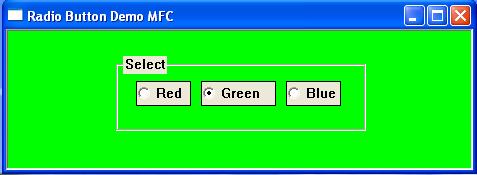
A radio button is a small circular box with an associated descriptive label. Radio buttons normally come in groups that allow the user to choose only one of a predefined set of mutually exclusive options. The following short program uses 3 checkboxes to change the window’s background colour. 


Download Code

For a further reading on the CButton class
https://docs.microsoft.com/en-us/cpp/mfc/reference/cbutton-class?view=vs-2019


Static control

MFC’s CStatic class encapsulates the Windows static control. Static controls are commonly used as labels for other controls. A static control displays text, shapes and pictures such as icons or bitmaps. The static control cannot be selected, accept input from the keyboard or mouse, and does not send WM_COMMAND messages back to the parent window.

For further reading on the CStatic classes
https://docs.microsoft.com/en-us/cpp/mfc/reference/cstatic-class?view=vs-2019


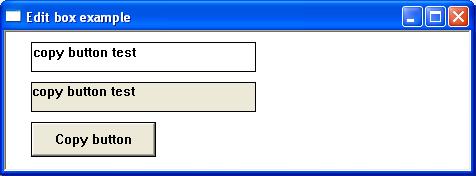
Editbox

MFC’s CEdit class encapsulates the functionality of edit controls. Edit controls are used for text entry and editing and come in two varieties: single-line and multiline,

For further reading on the CEdit class
https://docs.microsoft.com/en-us/cpp/mfc/reference/cedit-class?view=vs-2019

In the following example clicking the button title ‘set button’ changes the contents of the static box to the value of the textbox.


Download Code


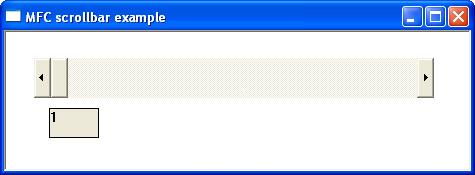
ScrollBar

MFC’s CScrollBar class encapsulates scroll bar controls. A scroll bar is an object that allows the user to adjust a particular value, a section of the window or view, by navigating either left and right or up and down. A scroll bar appears as a long bar with a small button at each end. Between these buttons, there is a moveable bar called a thumb. Scrollbars exist in two forms: the standard scroll bar and the scroll bar control. The standard scroll bar is an integral part of a window, whereas the scroll bar control exists as a separate control

For further reading on the CScrollBar class
https://docs.microsoft.com/en-us/cpp/mfc/reference/cscrollbar-class?view=vs-2019

The following short program demonstrates a horizontal scrollbar control. The scrollbar position is shown in the static class.

Download Code


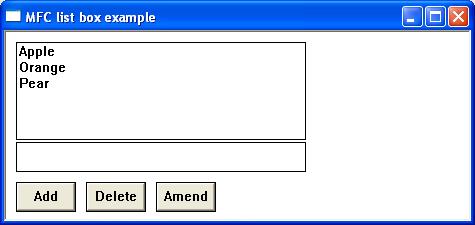
Listbox

MFC’s Clistbox Class encapsulates the Windows listbox control. A listbox displays a list of selectable items in a scrollable box. Users can select or deselect one or more of these items by clicking the appropriate line of text. For further reading on the CListBox class
https://docs.microsoft.com/en-us/cpp/mfc/reference/clistbox-class?view=vs-2019

The following short program creates a listbox and then adds a limited number of selectable items. Clicking any list item results in the selected listview value being copied to the static box. Clicking the ad button adds a new record, clicking the amend button amends the selected listview value, and clicking the delete button deletes the selected listview item.


Download Code


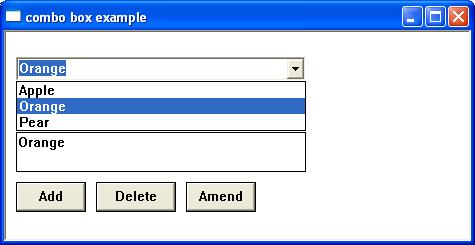
Combo Box

MFC’s CComboBox class encapsulates the functionality of the ComboBox controls. A combo box or drop-down list is a combination of a listbox and editbox, allowing the user to either type a value directly or select a value from the list. The following list outlines possible combo-box styles.

For further reading on the CComboBox class
https://docs.microsoft.com/en-us/cpp/mfc/reference/ccombobox-class?view=vs-2019

The following short program displays a dropdown list or combo box. Items can be added deleted or amended using the textbox and the appropriate button.


Download Code

Adding Menus

In Windows, a menu bar is a horizontal bar most often displayed immediately below the caption bar and usually containing a list of drop-down menu items. These drop-down menus can contain either other menu items or nested sub-menus.

MFC encapsulates menus and all associated actions in the CMenu class. MFC menus are usually created programmatically or from a resource file which can then be loaded into the application at run time.

To create and maintain menus programmatically, the developer will need to instantiate a class CMenu object and then use the following member functions: CreateMenu(), CreatePopupMenu(), and AppendMenu() to create the menu items.

CreateMenu

Is used to create a top-level menu. The prototype of this function is

BOOL CreateMenu( );

Returns nonzero if the menu creation was successful. 0 if menu creation failed

CreatePopupMenu

Creates a pop-up menu and attaches it to the CMenu object. The prototype of this function is

BOOL CreatePopupMenu( );

Return Nonzero if the pop-up menu was successfully created; 0 if menu creation failed

AppendMenu

Appends a new item to the end of a menu. The prototype of this function is

BOOL AppendMenu( UINT nFlags, UINT nIDNewItem = 0, LPCTSTR lpszNewItem = NULL); BOOL AppendMenu( UINT nFlags, UINT nIDNewItem, const CBitmap* pBmp );

nFlags – Specifies information about the state of the new menu item.
nIDNewItem – Specifies either the command ID of the new menu item or, if nFlags is set to MF_POPUP, the menu handle ( HMENU) of a pop-up menu.
lpszNewItem – Specifies the content of the new menu item.
pBmp – Points to a CBitmap object that will be used as the menu item.

For further detailed reading
https://docs.microsoft.com/en-us/cpp/mfc/reference/cmenu-class?view=vs-2019#appendmenu

The ON_COMMAND macro

The ON_COMMAND macro in the message map links menu messages to a message response function. The prototype for this function is

ON_COMMAND( Id, mFuction )

where
id – is the menu items ID,
mFuction -is the name of the function that will handle that message.

To map a range of menu commands to a single message response use the ON_COMMAND_RANGE macro. The prototype for this macro is

ON_COMMAND_RANGE( id1, id2, mFunction )

where
id1 – Command ID at the beginning of a contiguous range of command IDs.
id2 – Command ID at the end of a contiguous range of command IDs.
mFunction – The name of the message-handler function to which the commands are mapped.

For this type of message mapping to work, the command IDs in the range must be consecutive.

Modifying Menus Programmatically

In addition to creating menus dynamically, menus can also be modified dynamically. The following table lists the CMenu member functions used to add, modify, and delete menu items.

InsertMenu

Inserts an item into a menu at a specified location. The prototype for this function is

BOOL InsertMenu( nPosition, nFlags, nIDNewItem, lpszNewItem ); BOOL InsertMenu( nPosition, nFlags, nIDNewItem, * pBmp );

where
nPosition – Specifies the menu item before the new menu item is inserted.
nFlags – Specifies information about the state of the new menu item
nIDNewItem – Specifies either the command ID of the new menu item or, if nFlags is set to MF_POPUP, the menu handle (HMENU) of the pop-up menu.
lpszNewItem – Specifies the content of the new menu item.
pBmp – Points to a CBitmap object that will be used as the menu item.

Returns nonzero if the function is successful; otherwise 0.
For further reading
https://docs.microsoft.com/en-us/cpp/mfc/reference/cmenu-class?view=vs-2019#insertmenu

ModifyMenu

Changes the command ID, text, or other characteristics of a menu item.

BOOL ModifyMenu( nPosition, nFlags, nIDNewItem, lpszNewItem ); BOOL ModifyMenu( nPosition, nFlags, nIDNewItem, pBmp );

NPosition – Specifies the menu item to be changed.
nFlags, nIDNewItem, lpszNewItem-see insert menu

For further reading
https://docs.microsoft.com/en-us/cpp/mfc/reference/cmenu-class?view=vs-2019#modifymenu

DeleteMenu

Deletes a menu item and the submenu associated with it, if any. The prototype of this function is

BOOL DeleteMenu( UINT nPosition, UINT nFlags );

Where
nPosition – Specifies the menu item that is to be deleted
nFlags – Is used to interpret nPosition

Return nonzero if the function is successful; otherwise 0

For further reading
https://docs.microsoft.com/en-us/cpp/mfc/reference/cmenu-class?view=vs-2019#deletemenu

RemoveMenu

Deletes a menu item

BOOL RemoveMenu( UINT nPosition, UINT nFlags );

where
nPosition – Specifies the menu item to be removed.
nFlags – Specifies how nPosition is interpreted
Return nonzero if the function is successful; otherwise 0.

The difference between RemoveMenu and DeleteMenu is that if the item being removed has a submenu, then deletemenu will remove the item and destroys the submenu, too. RemoveMenu removes the item but leaves the submenu extant in memory.

Before a menu is modified, the developer will need the CMenu pointer referencing the menu. MFC’s CWnd::GetMenu function returns a CMenu pointer for a window’s top-level menu or NULL if the window doesn’t have a top-level menu-

CMenu* pMenu = GetMenu (); pMenu->DeleteMenu (1, MF_BYPOSITION);

The Popup or Context Menu

Popup or context menus are those that generally appear when the user right-clicks. This menu is often referred to as a context menu because the options in the menu relate to what was right-clicked. The popup menu can be loaded from an existing resource or created dynamically with a call to the function CreatePopupMenu().

The cmenu member function TrackPopupMenu() displays a context menu. The function prototype is

BOOL TrackPopupMenu (UINT nFlags, int x, int y, CWnd* pWnd, LPCRECT lpRect = NULL)

Where
nFlags – Specifies screen-position and mouse-position flags.
Use one of the following flags to specify how the function positions the shortcut menu horizontally.
TPM_CENTERALIGN – Centers the shortcut menu horizontally relative to the coordinate specified by the x parameter.
TPM_LEFTALIGN – Positions the shortcut menu so its left side is aligned with the coordinate specified by the x parameter.
TPM_RIGHTALIGN – Positions the shortcut menu so its right side is aligned with the coordinate specified by the x parameter.
Use one of the following flags to specify how the function positions the shortcut menu vertically.
TPM_BOTTOMALIGN – Positions the shortcut menu so its bottom side is aligned with the coordinate specified by the y parameter.
TPM_TOPALIGN – Positions the shortcut menu so its top side is aligned with the coordinate specified by the y parameter.
TPM_VCENTERALIGN – Centers the shortcut menu vertically relative to the coordinate specified by the y parameter.
x – Specifies the horizontal position in screen coordinates of the pop-up menu.
y – Specifies the vertical position in screen coordinates of the top of the menu on the screen.
pWnd – Identifies the window that owns the pop-up menu.
lpRect – Ignored.

Returns the result of calling TrackPopupMenu

Example

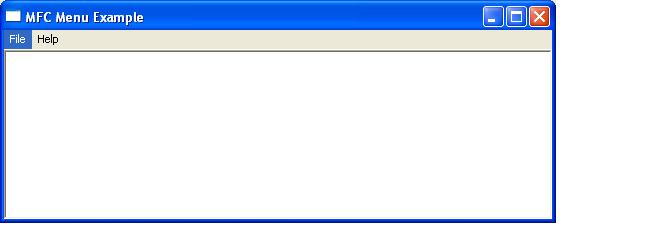
The short program below demonstrates a simple menu structure. Clicking file>new will produce a messagebox and file>exit will close the application. A right-click will produce a context menu containing the same menu items as the main menu.

Download Code